Growby’s WhatsApp marketing software has powerful automation features. These features help businesses to automate trivial tasks so that the customers don’t have to wait for too long to get a response.
Growby has mainly two categories of automation feature
- Incoming message based automation
- Date based automation
These two automation have their own use cases. Based on the needs of businesses, each of these automation can be enabled.
Now, lets deep dive into the first one:
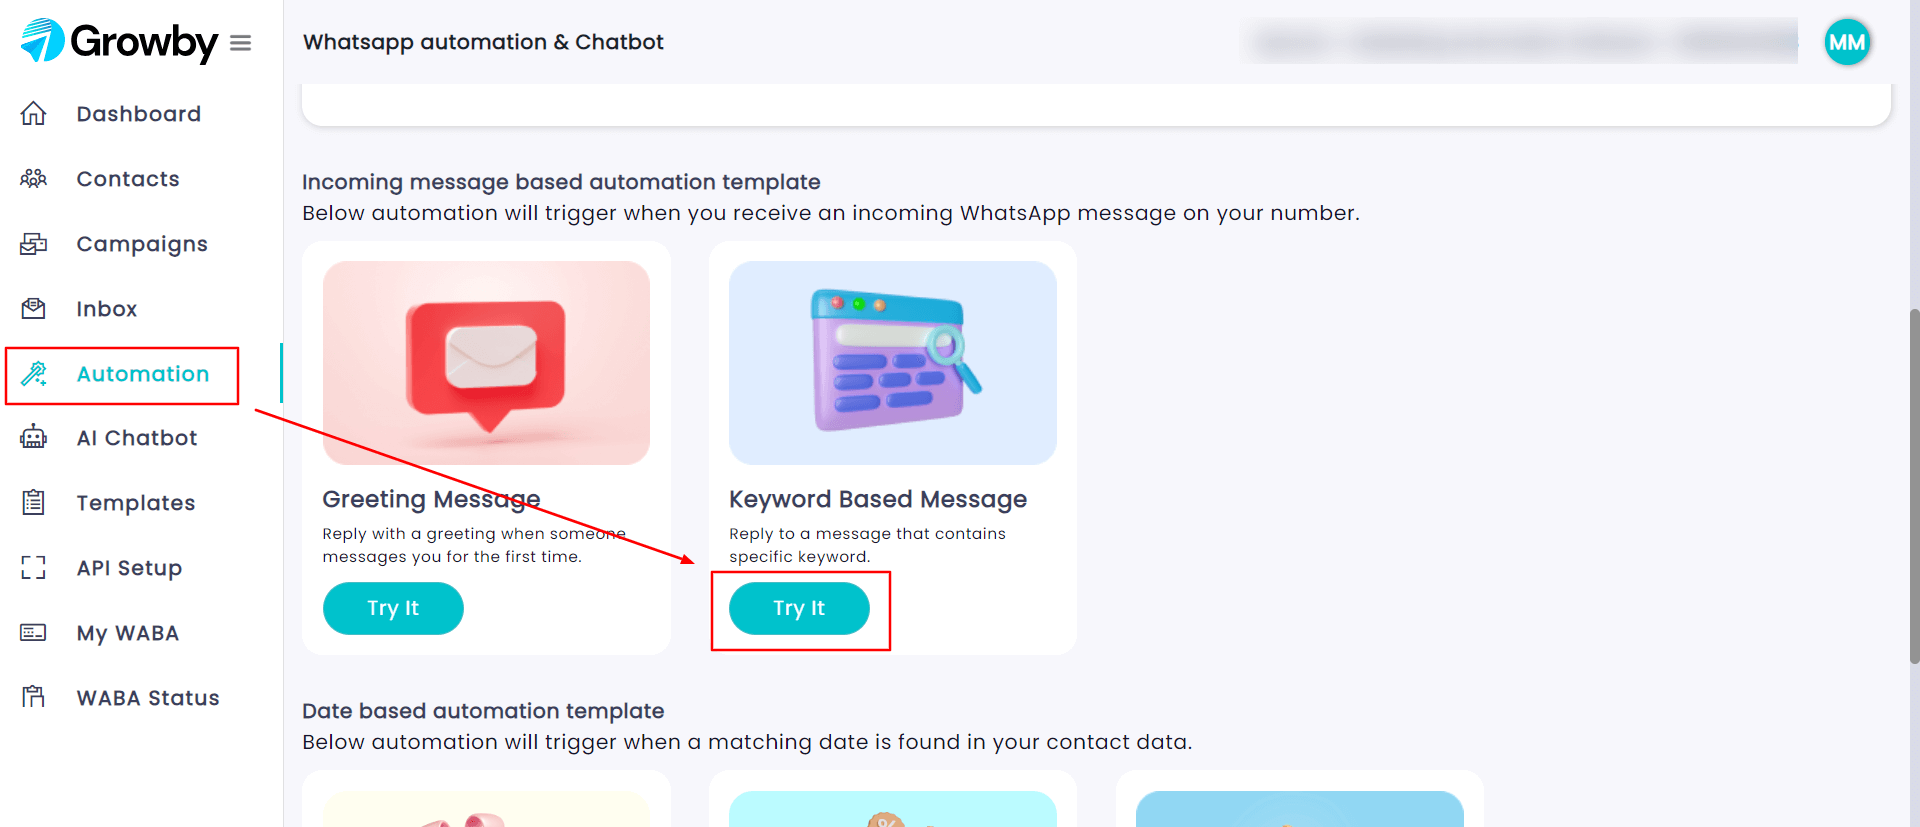
Incoming message based automation
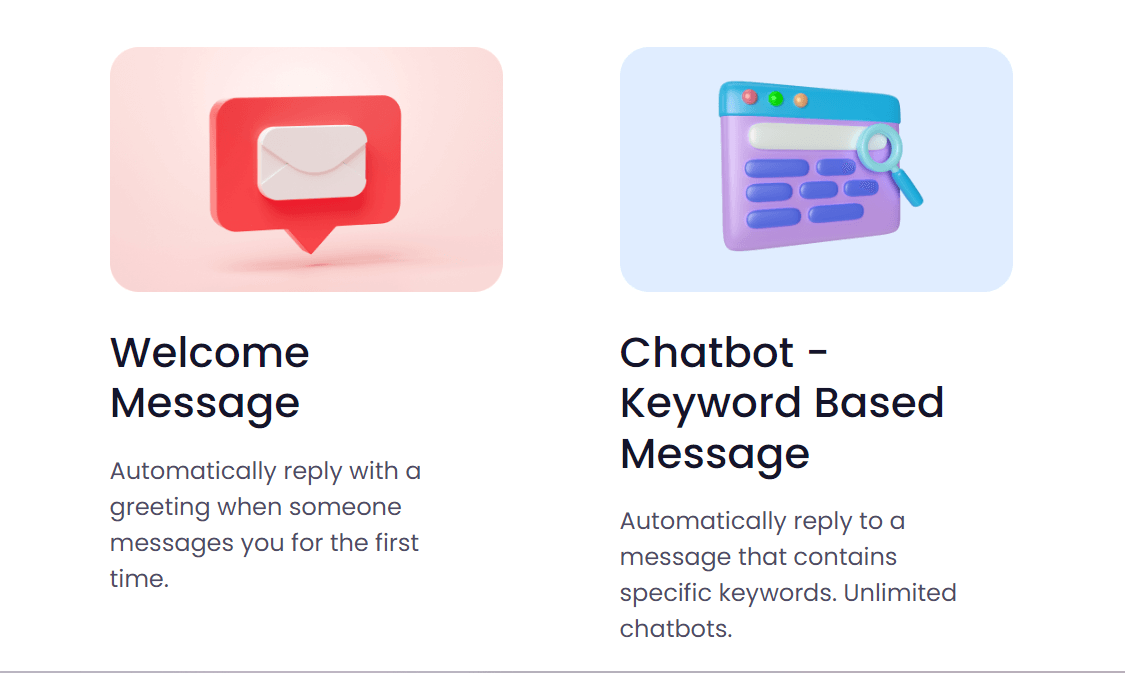
There are two ways in which you can greet an incoming message using the Growby Panel.
1. Welcome Message
2. Keyword Based Message
Welcome Message
Using this feature, you can create a personalized message in the Growby dashboard. So that, when a customer messages you first, an automated greeting is sent to them instantly.
Let us show how you can create:
Step 1: Open app.growby.net and login with your credentials.
Step 2: Click on Automation
Step 3: Click on Try It button under the Greeting Message Feature
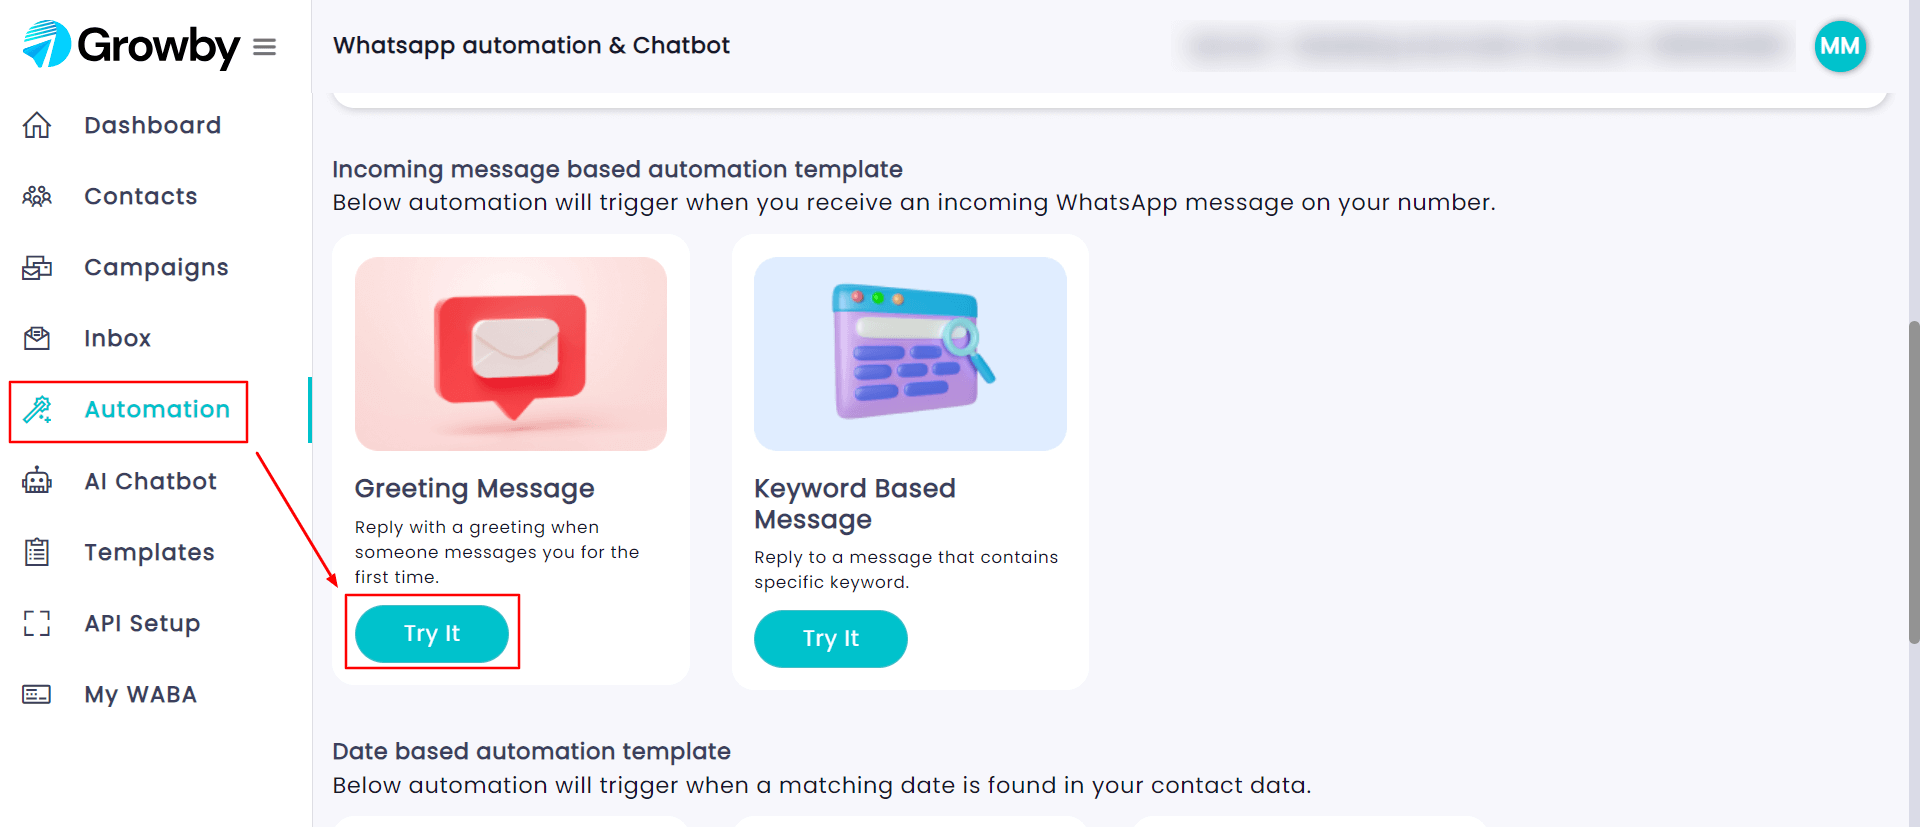
You will see the following dashboard as shown in the pic below
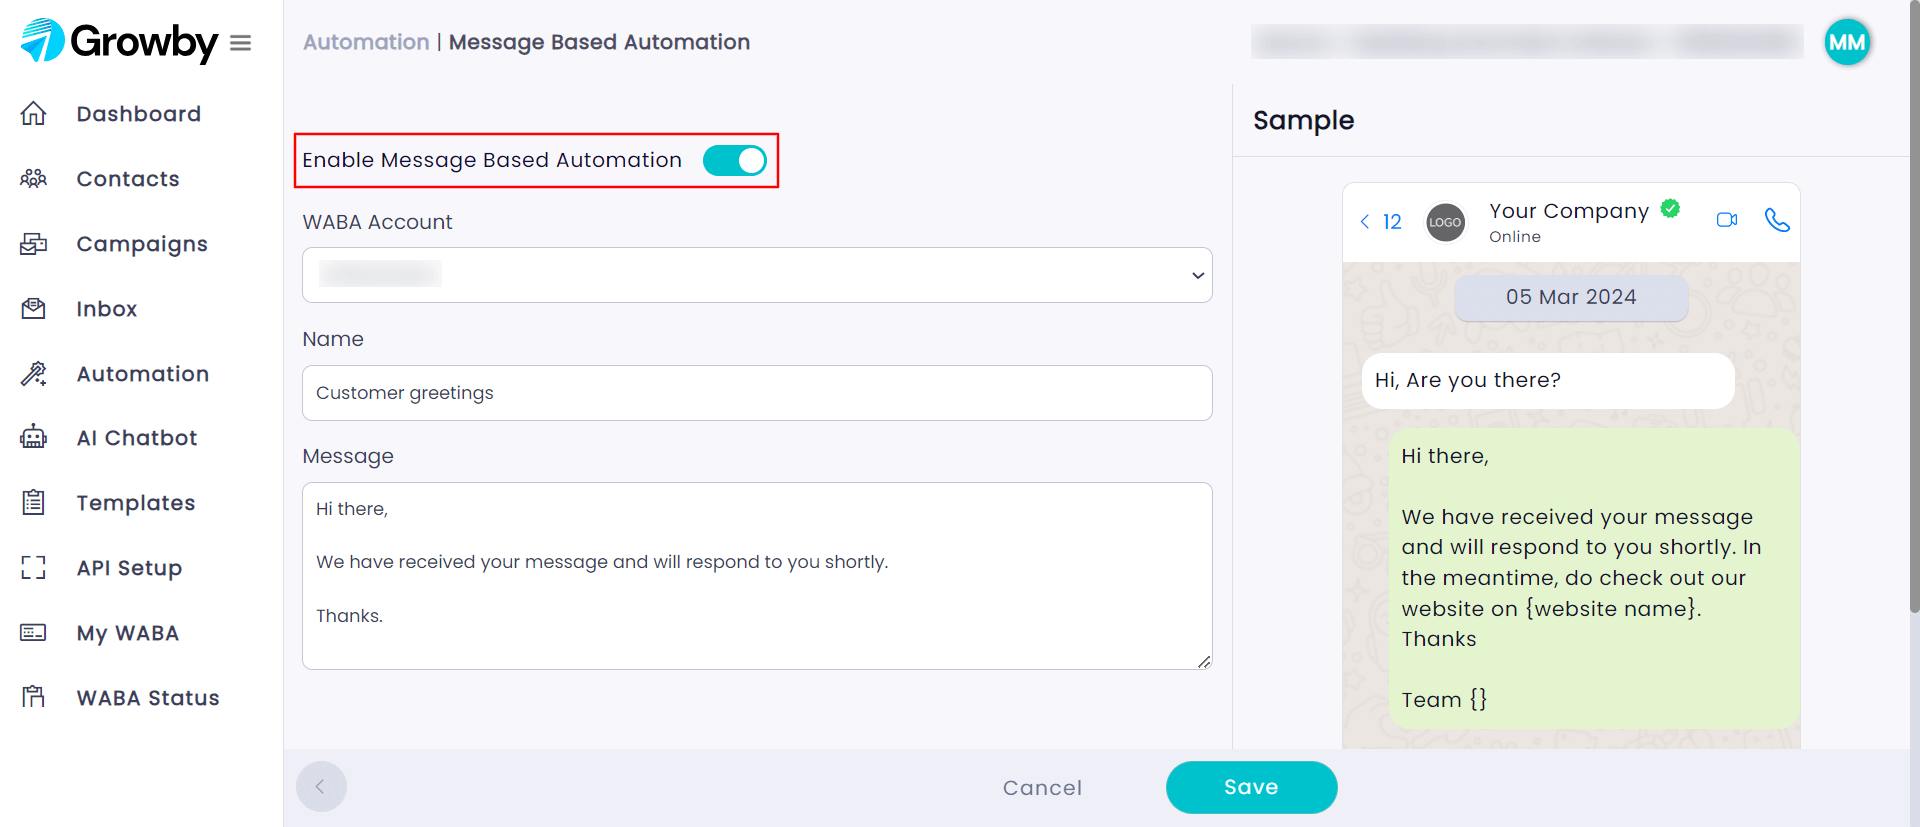
Step 4: Select your WABA Account
Step 5: Set the Name for greetings message (This is just for your reference)
Step 6: Type the greeting message you want the customers to receive.
Step 7: Enable the toggle button which is highlighted in the above image.
Step 8: Click on Save
Let’s jump on to the 2nd type of feature
Keyword Based Message
In this feature, you have to set certain trigger words. And those trigger words will have messages connected with them.
So when a customer sends you a message with one of those trigger words in it, the message that was set up for thattrigger word will be sent to the customer.
For ex: Let the trigger word be “Price”
And you have set the message as “ To know the price, you can visiting our pricing page”So, when a customer texts you something like – “Hi, i would like to know the price of the software” , the price word gets triggered, and the message is sent instantly.
Let us show you how you can create this using the Growby Dashboard.
Step 1: Login to app.growby.net
Step 2: Click on automation
Step 3: Click on try it under the keyword based automation feature
You will see the following dashboard as shown in the pic below
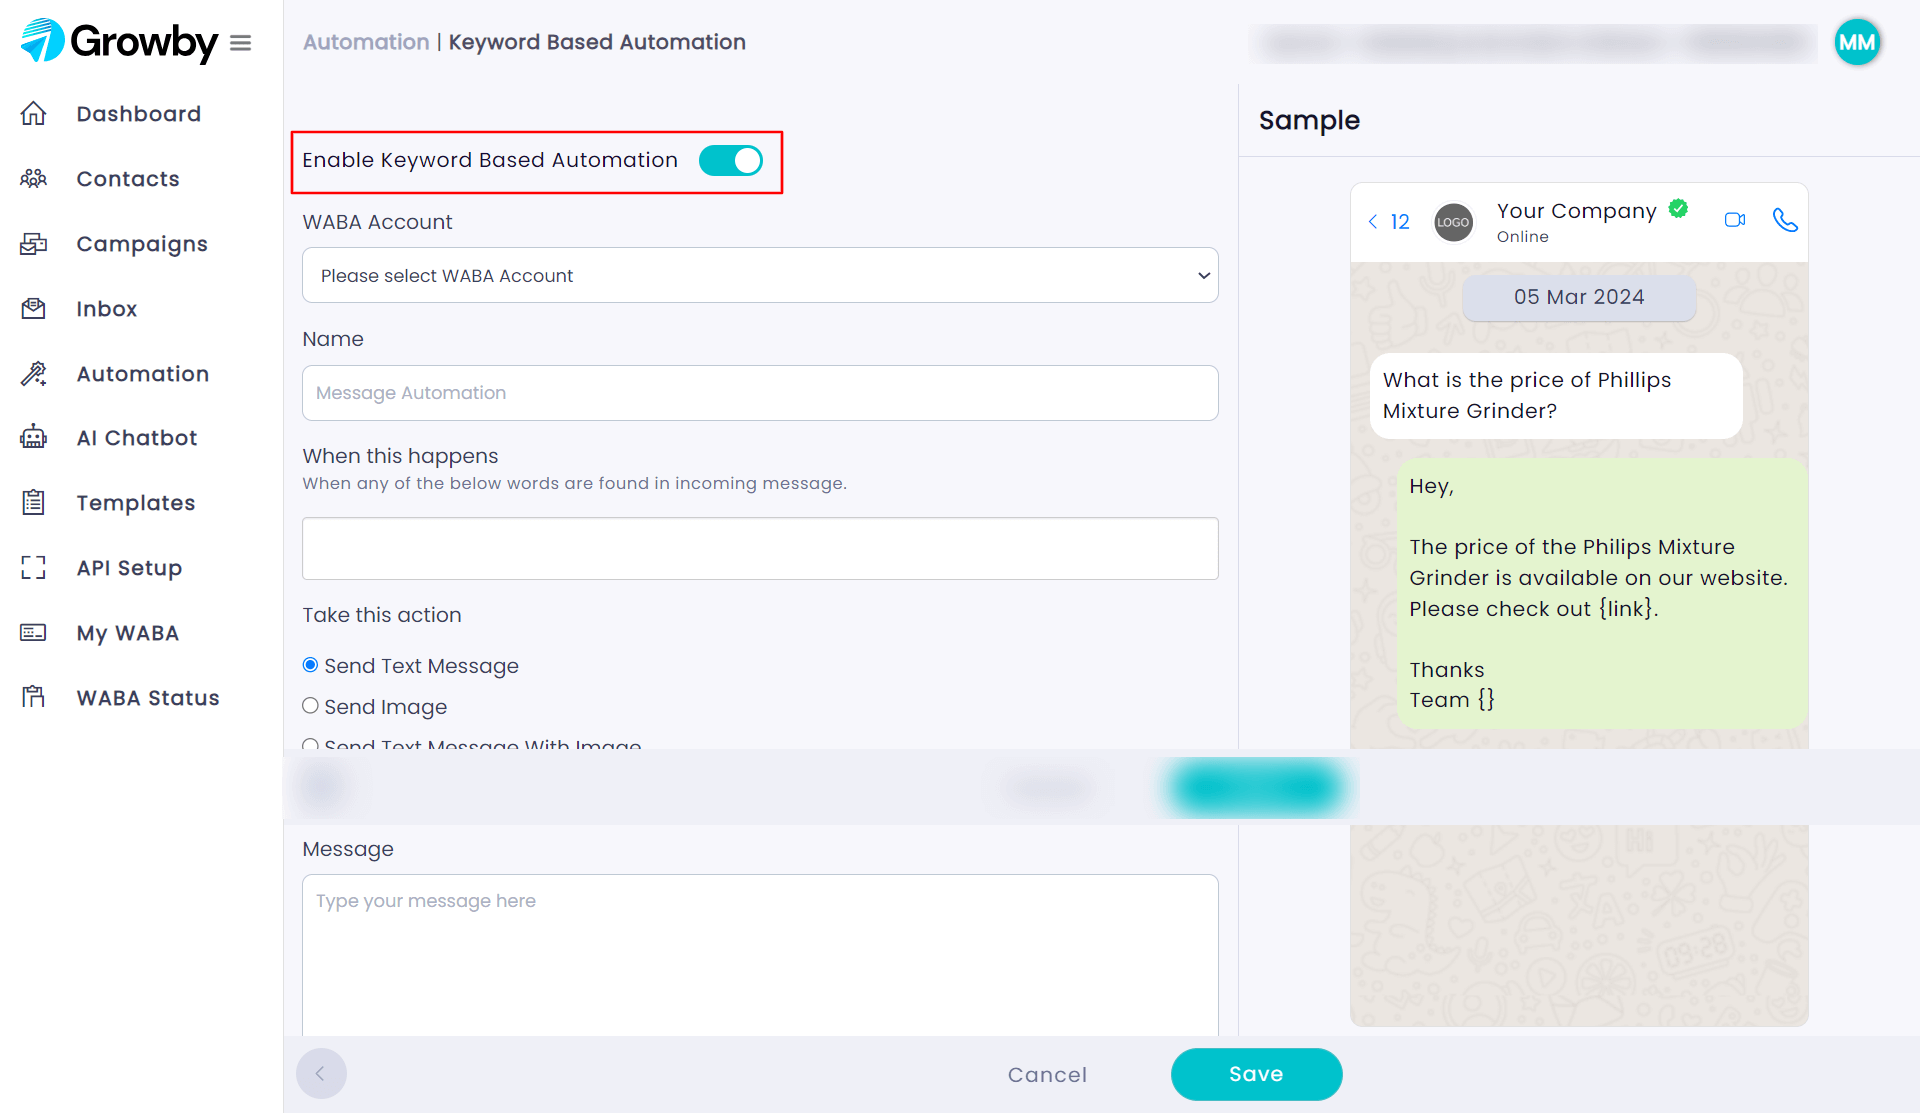
Step 4: Select your WABA account
Step 5: Write the name for this automation ( This is only for your reference )
Step 6: Type the keywords in the “When this happens” box
Step 7: Choose the type of message you want to send under the “Take this action”
Step 8: Write the message which you want to be sent when the keyword is triggered.
Step 9: Enable the toggle button which is highlighted in the above image.
Step 10: Click on Save
And that’s it, you have successfully set the keyword based automation for your business using the Growby Panel.
Now, let move forward with the second category of automation feature
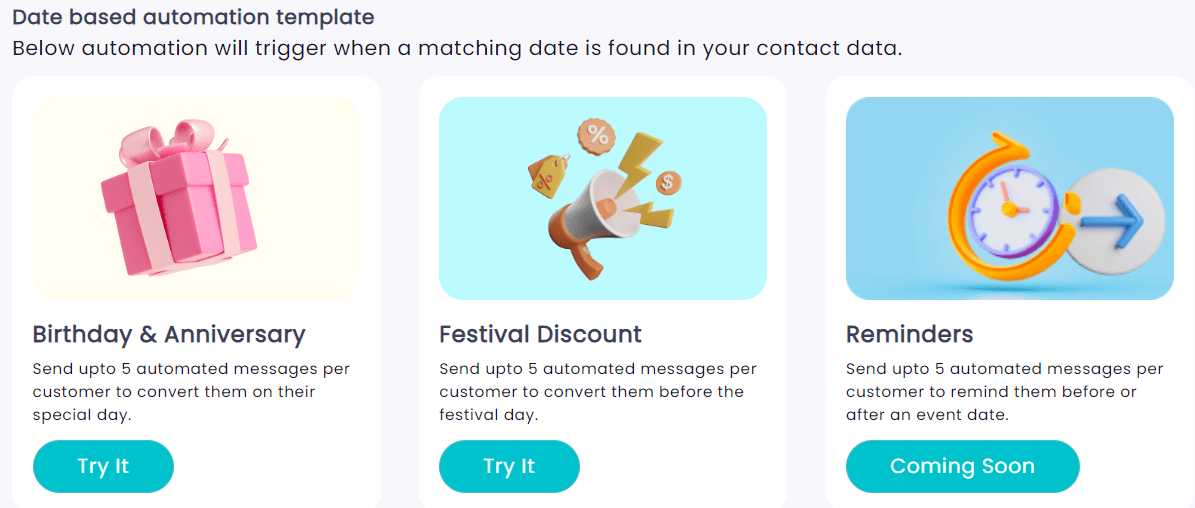
Data Based Automation
In data based automation, a message is sent when a matching date is found in your data.
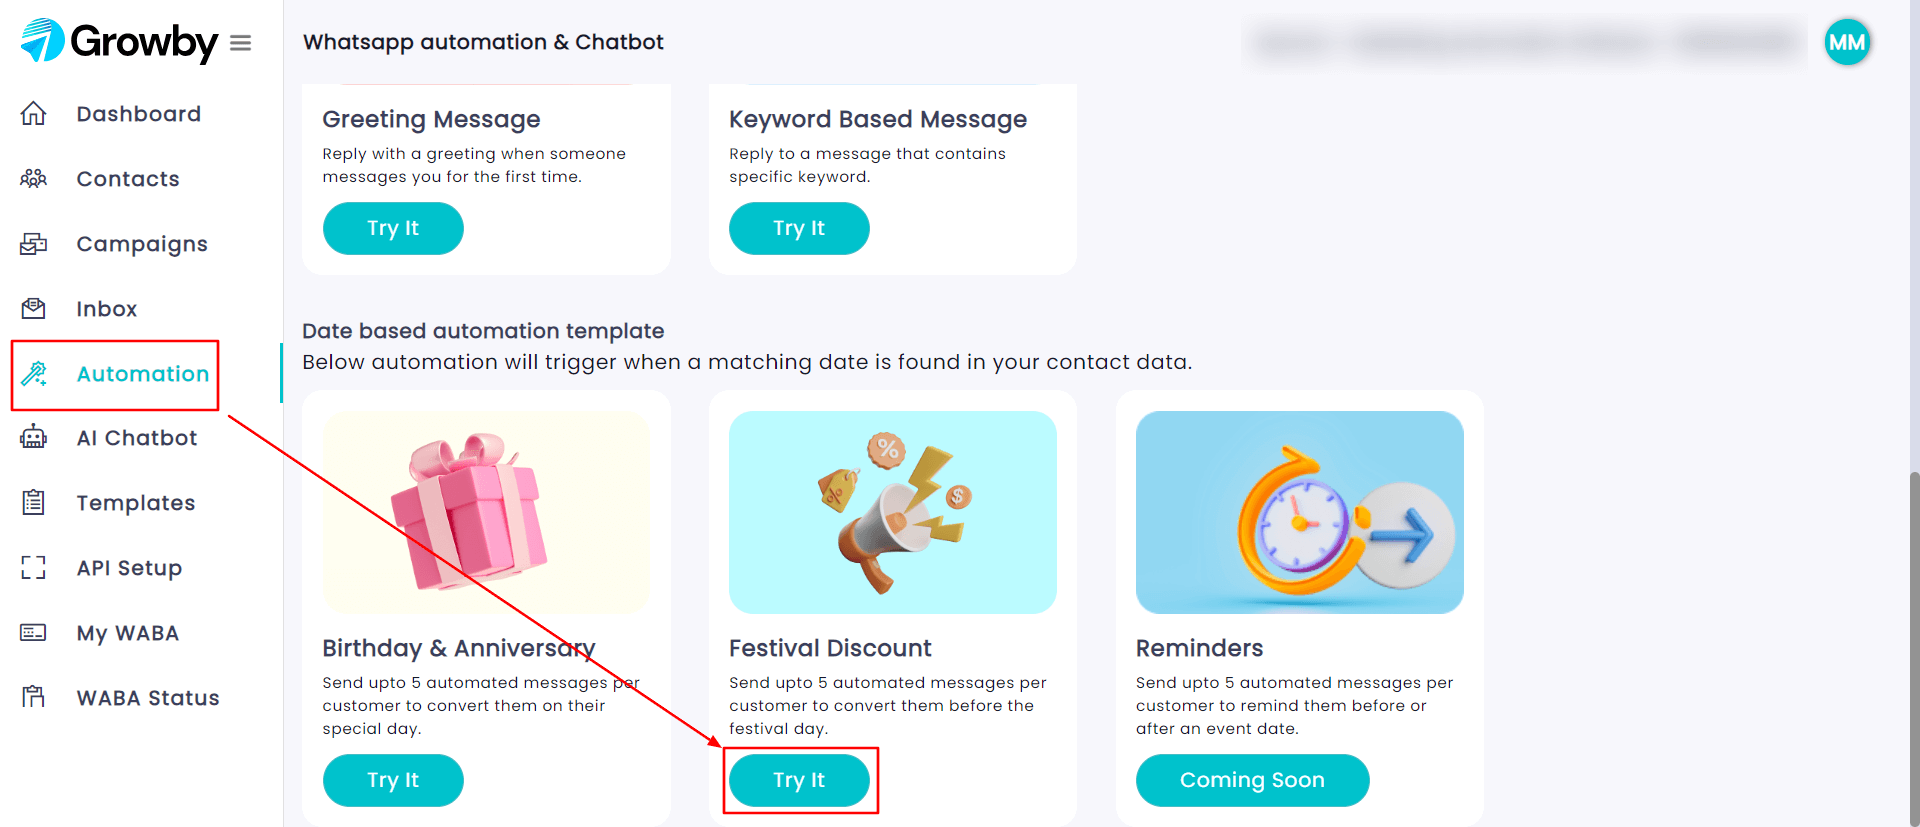
There are 3 categories in Growby’s data based automation
- Birthday and Anniversary
- Festival Discount
- Reminders ( coming soon )
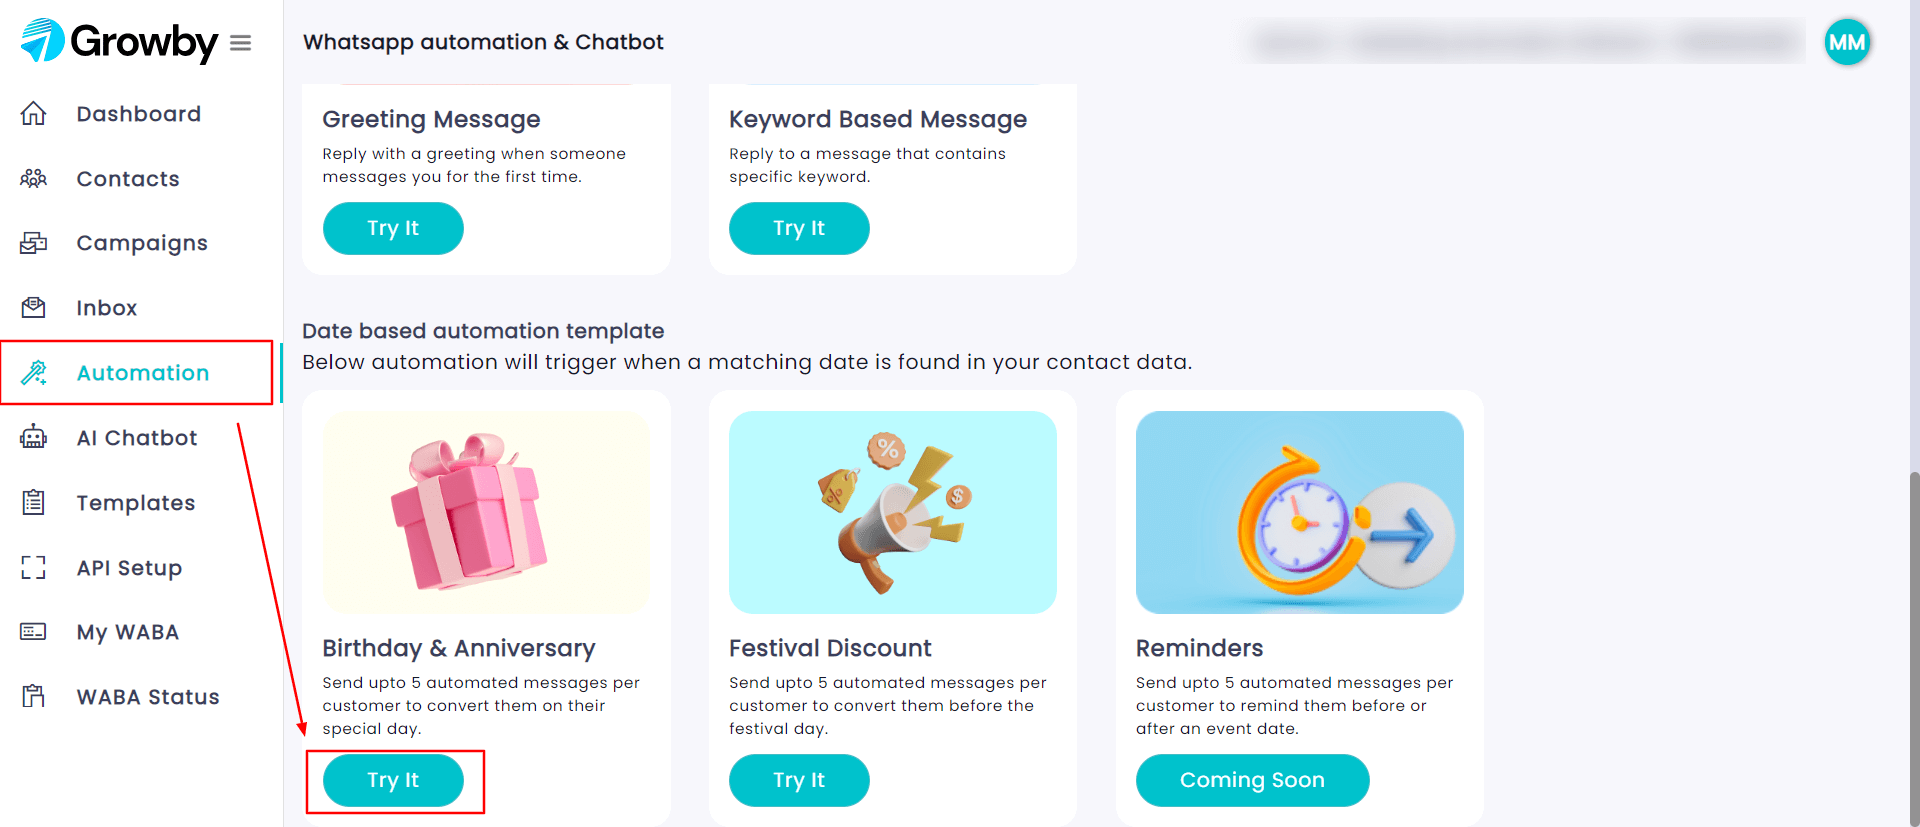
Birthday & Anniversary
Step 1: Login to app.growby.net using your credentials
Step 2: Click on Automation
Step 3: Click on Try it under “Birth and anniversary feature”
You will see the dashboard as shown below
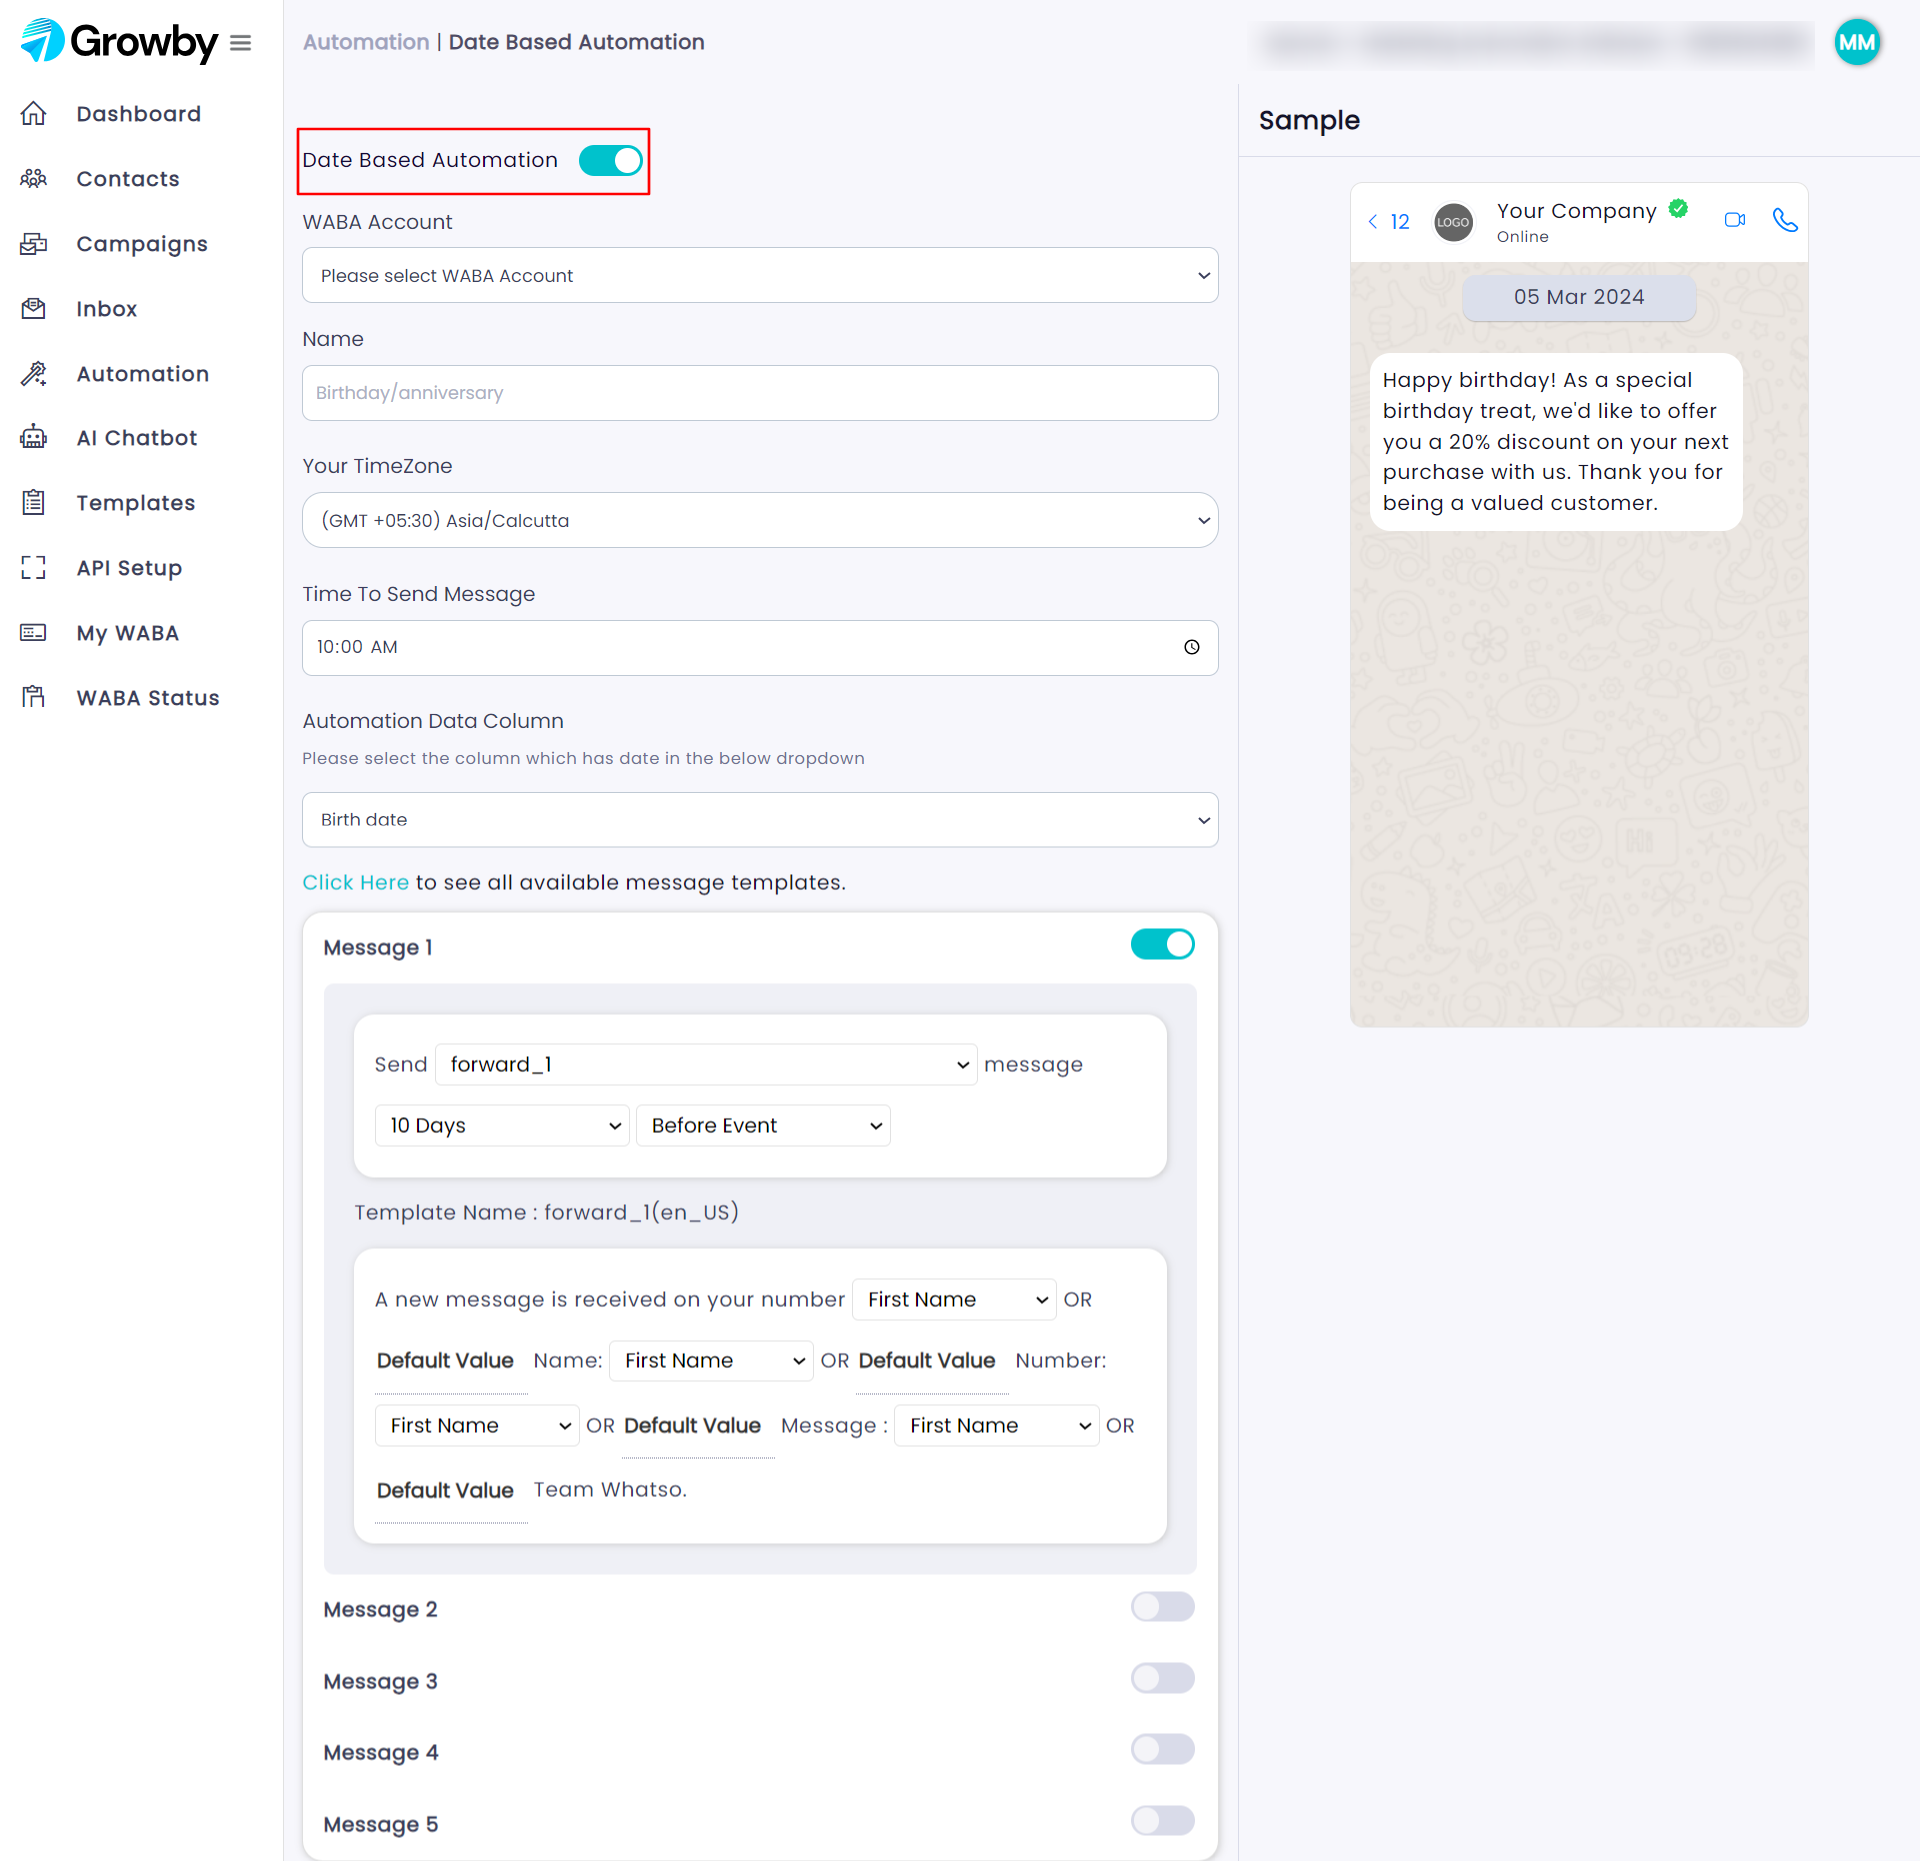
Step 4: Select WABA account
Step 5: Write the name ( this is for your own reference)
Step 6: Select the time zone in which your data resides in
Step 7: Select any column from the drop down under the automation data column
Step 8: You can customize the template by enabling any of the messages as shown in the picture.
Step 9: Enable the toggle button as highlighted in the image
Step 10: Click on Save
Note: If you want to add your own template, simply click on – “Click here to see all available messaging template”
That’s it, your automated birthday message feature is enabled.
Festival Discount
Step 1: Log in to app.growby.net
Step 2: Click on Automation
Step 3: Click on try it under the Festival discount feature
You will come across the following dashboard as shown in the picture below
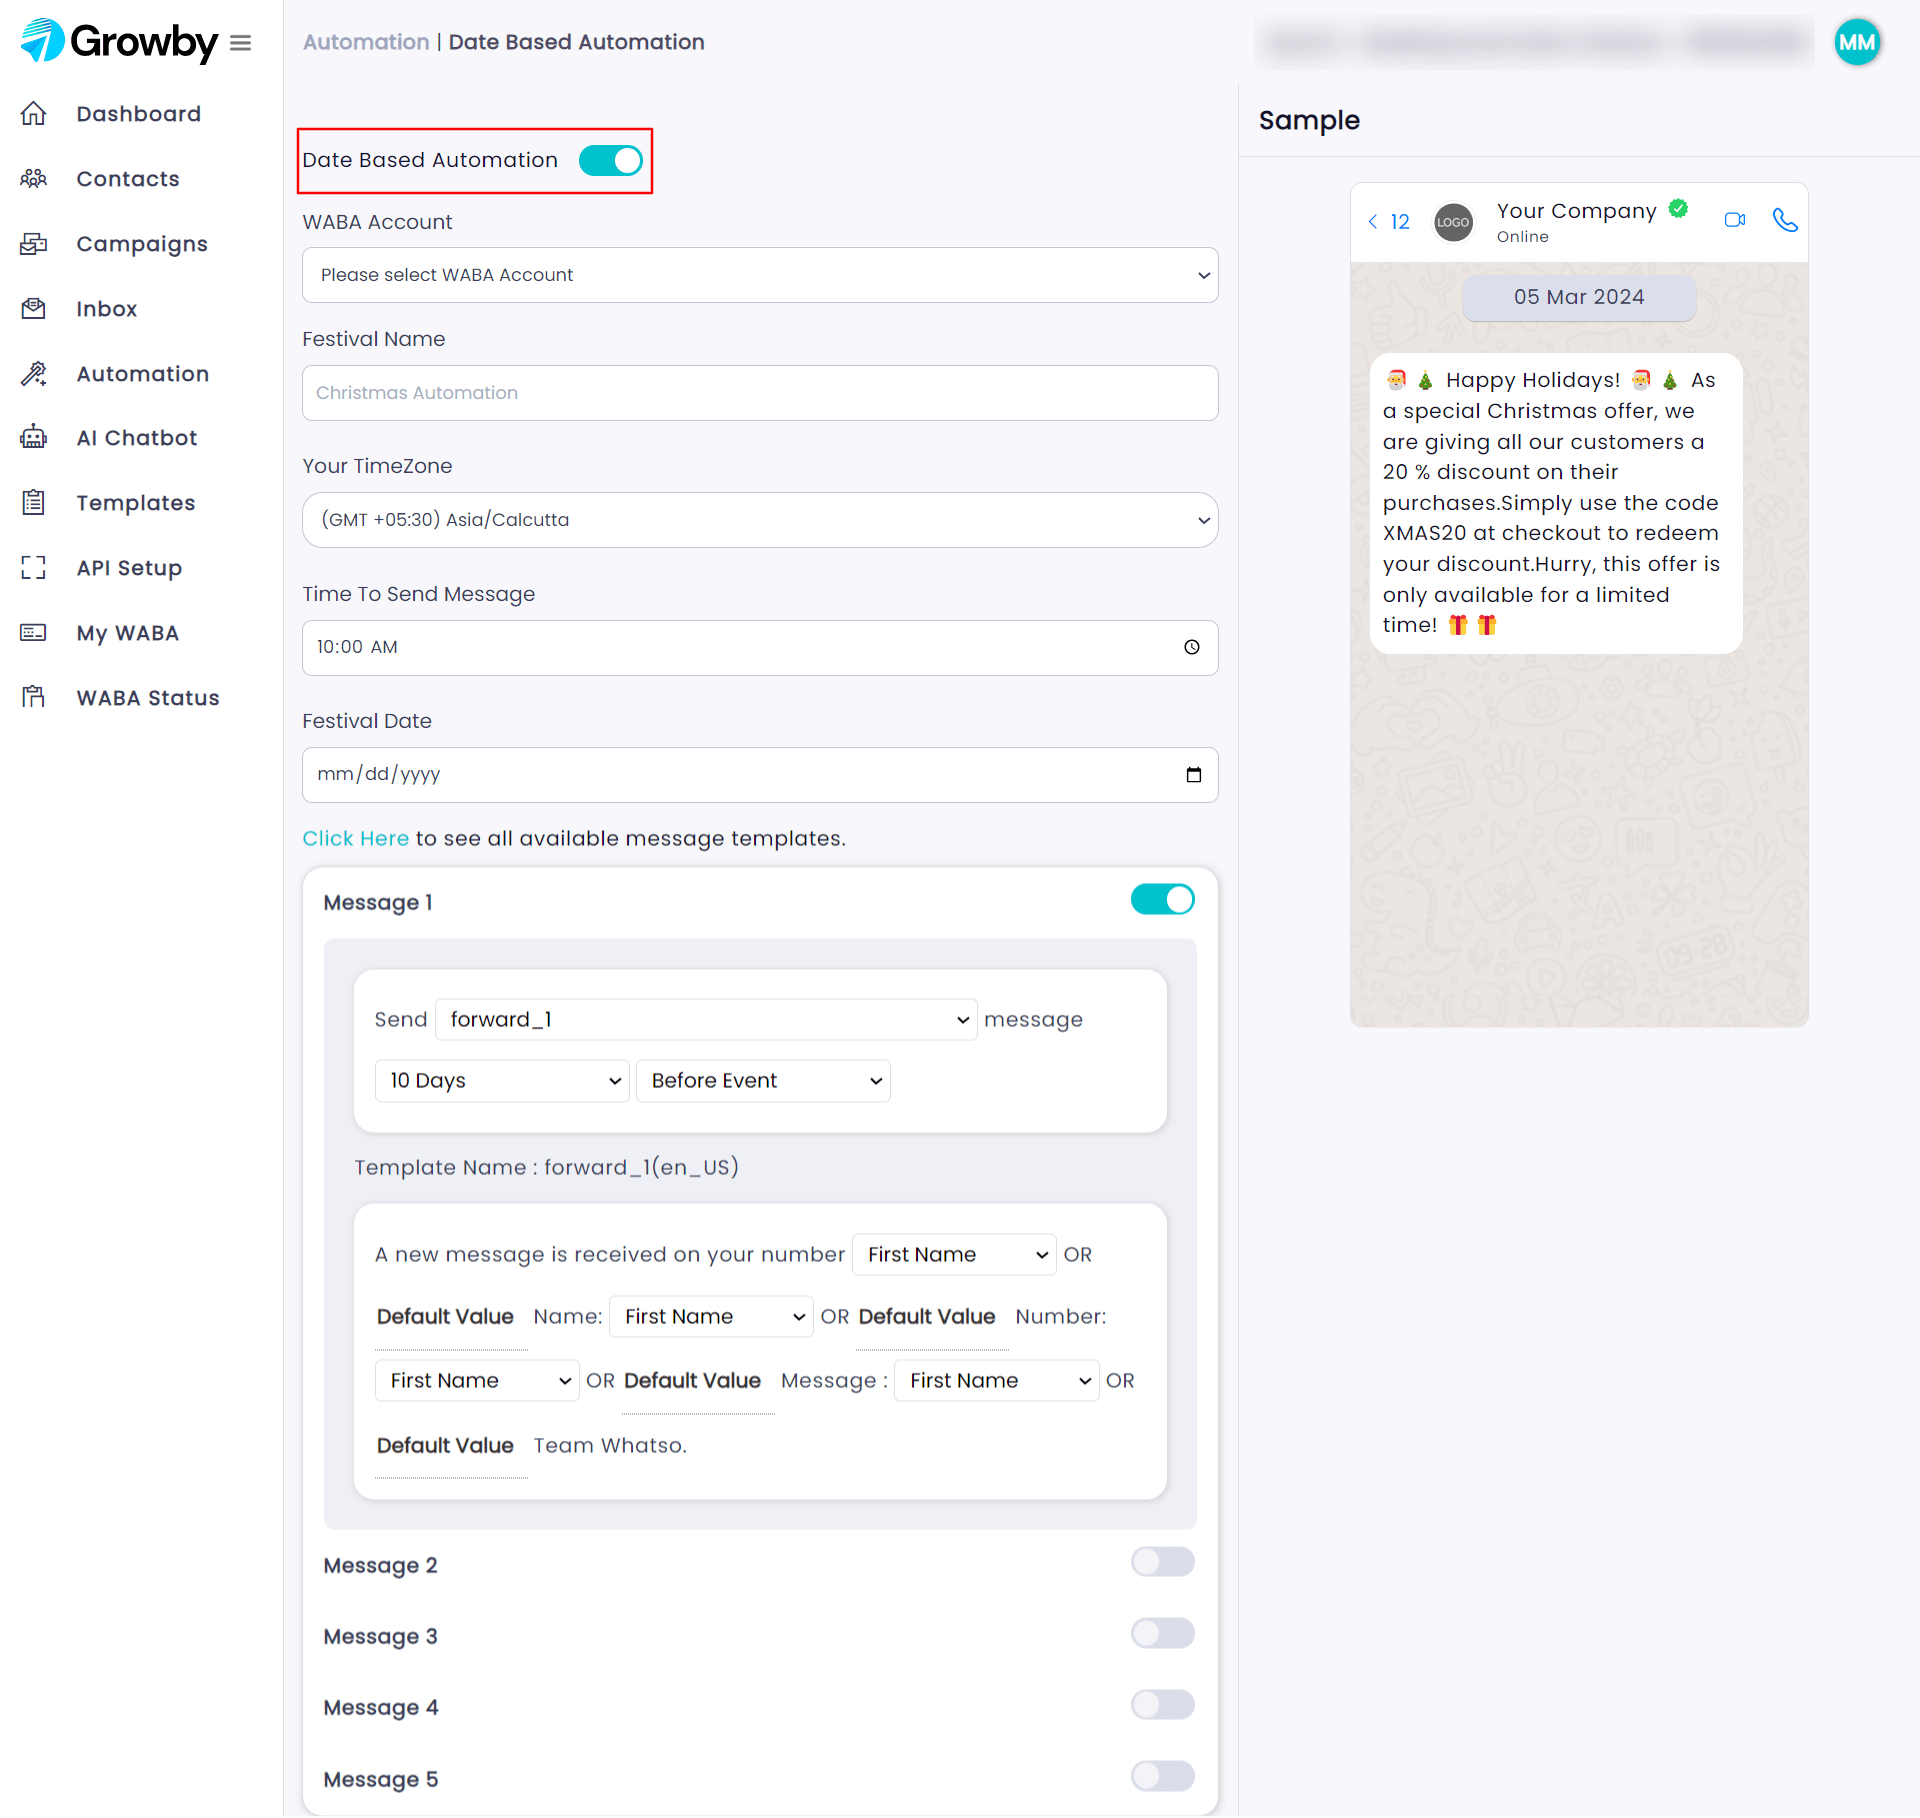
Step 4: Select your WABA account.
Step 5: Write the festival name of your choice
Step 6: Select the time zone
Step 7: Select the time at which the message should be sent to the customers
Step 8: Select the festival date from the calendar
Step 9: Select the message and customize it according to your needs.
Step 10: Enable the toggle button which is highlighted in the image
Step 11: Click on Save
Note: If you want to add your own template, simply click on – “Click here to see all available messaging template”
And that’s it, your festival reminder automation setup is complete.
In this way, you can exploit the powers of automation using Growby’s WhatsApp marketing software.